Sure, you can buy a centerpiece display of flowers already perfectly arranged in a vase, but it's really not difficult to arrange your own floral centerpiece if you want to save a bit of money and give the bouquet your own personal touch.
I think it's really fun to pick out different stems of flowers from the local farmers' market in colors that match my tablecloth. (I am easily thrilled.) With spring coming, maybe you will have some daffodils and tulips to cut from your own garden very soon. Or, sometimes, a nice guest will bring a wrapped bouquet of flowers as a hostess gift. (We love those guests, don't we?) So, rather than just jam the flowers in a vase willy-nilly, here's a video tutorial on flower arranging that I found helpful. The lady in the video (Alexandra Lyons) explains everything pretty clearly. (Sorry they make you watch an ad before the video. I guess some people want to get paid.)
Click here for the video on flower arranging from videojug.com
She has some tips I found helpful:
1) Cut the stem of every flower at least an inch to make the flowers last longer.
2) Cut off all the leaves that would be underwater to prevent bacteria from growing.
3) Don't put all of one kind of flower together.
Here are some tips I've gleaned over the years that she didn't mention, but I've found helpful to make a beautiful bouquet. It makes it seem like you really know what you are doing!
1) It you don't have quite enough flower stems to fill your vase, use scotch tape to create a grid across the top of your vase. (Put some pieces of tape vertically across the top of the vase, and cross them horizontally with more pieces of tape.) It will keep the stems separated and make the bouquet look fuller and more orderly. The stems will stand upright instead of drooping over.
2) Cut some stems an inch or so shorter than other stems. Put the tallest flowers in the middle of the vase, and the shorter stems as a circle around the tallest flowers. It shouldn't look like a couple tall flowers poking out above a circle a short flowers - you need to cut them so the size difference is gradual. This creates a nice rounded shape for the centerpiece. This type of arrangement works in almost any type of vase.
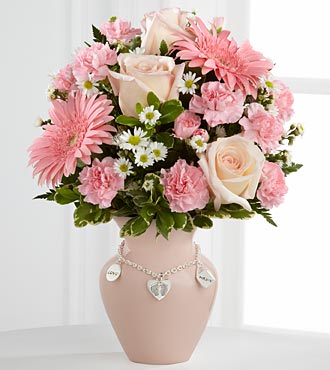
Here is a bouquet from ftd.com that illustrates what I mean by cutting the flowers around the sides shorter than the stems in the middle.
No comments:
Post a Comment